Use ChatGPT in your Apps and Flows
Well not really ChatGPT but its older sibling GPT3 ...
table of contents
I already created this YouTube video in September 2022 to show what you can do with GPT-3 and the Power Platform. Fast forward to today I'd like to talk about some upgrades that are now available and give some deeper insights about OpenAI, GPT-3 and ChatGPT.
What is OpenAIs GPT-3
While AI has been around for a long time, it used to be an abstract concept that we somehow used subconcious in different technology.
Creating and training AI models of course became easier over time. But the models (or sometimes good, sometimes not so good) were mainly limited to one use-case.
Enter GPT-3, which has been around since 2020, with a generally available API since the end of 2021. You read that right - most of the fancy stuff you can do with ChatGPT has been accessible to everyone for the past 1.5 years, yet nobody paid it much attention. What sets GPT-3 apart from other AI models is that it is a general-purpose model with a simple “text in, text out” interface. You ask the AI to do something, and it simply answers. That is a concept everyone can use and understand.
GPT-3 gets its knowledge from these sources:
- Common Crawl's web archive (so basically a filtered version of THE INTERNET)
- lots of books
- large parts of wikipedia
What is the hype about ChatGPT?
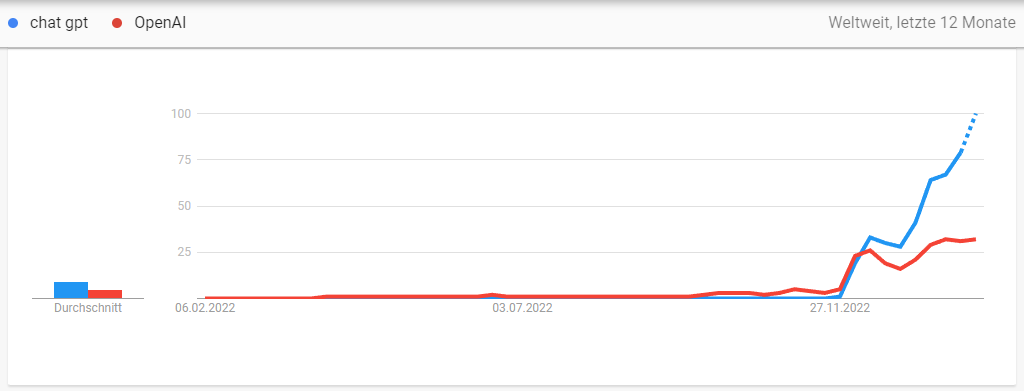
Like I said earlier GPT-3 is publicly available since 1.5 years - but nobody cared. So let's take a look at the difference between GPT-3 and ChatGPT.
ChatGPT is actually based on GPT-3, but is trained on large datasets of conversations. Unlike GPT-3, ChatGPT is optimized for generating responses in conversational contexts. Furthermore OpenAI developed an upgrade to the Da Vinci engine (before it was called "text-davinci-2", now we are at "text-davinci-3"). This is also the most advanced engine ChatGPT is based on, but it's also available in GPT-3.
Now we let both of them answer the same question: "Write code for a cookie consent banner in react with the buttons "Accept" and "Decline", hide the banner when the user clicks a button. Also provide some CSS to style the banner."
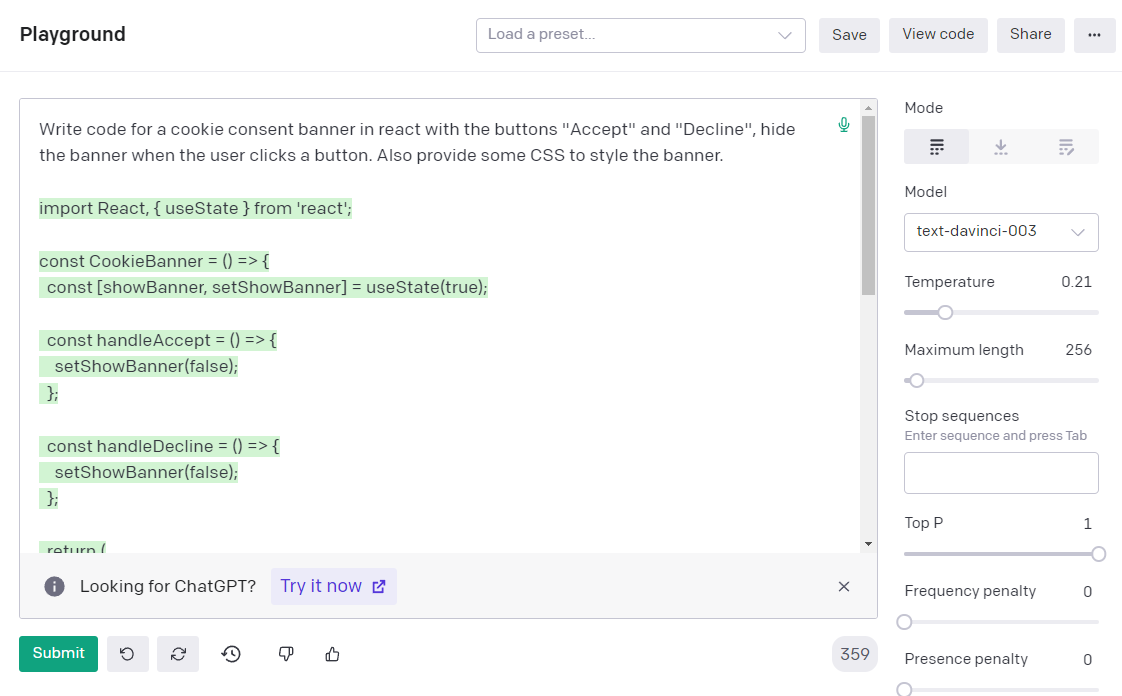
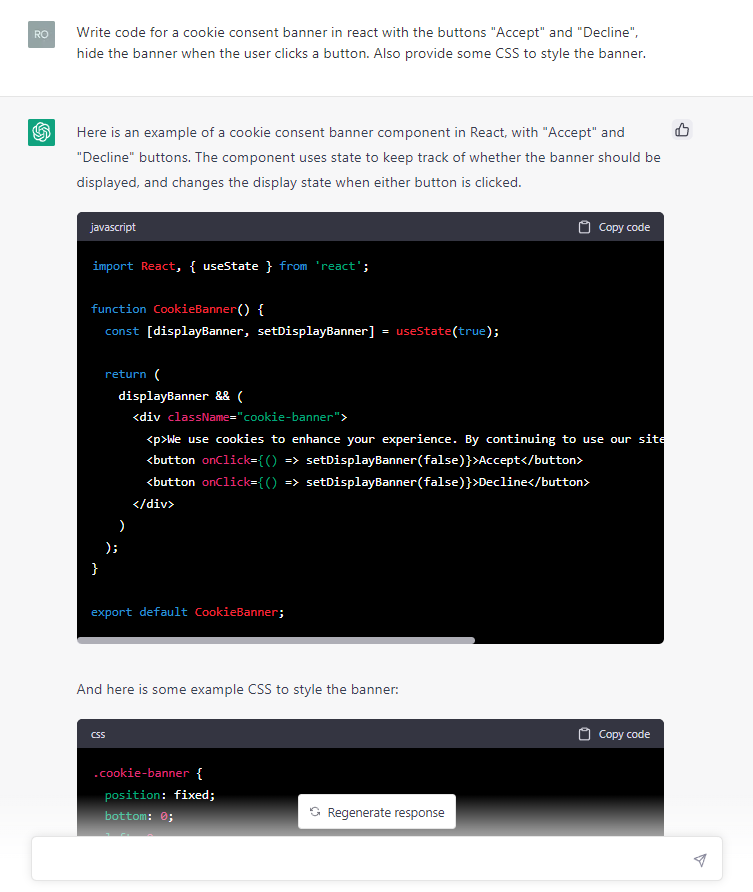
I'd say code-wise the two are on par (both far from perfect), but the presentation of ChatGPT is so much nicer.
It feels more like a blog post with the formatted code and the explanations in between.
So I think the three ingredients for the success of ChatGPT are:
- further development of the GPT-3 model
- it's free (everyone likes free stuff)
- super easy and relatable "chat" approach with nice formatting
So far this blog post is really getting nowhere, but I found it really interesting to take a closer look at the sudden success of ChatGPT. It is really just OpenAIs 1.5 year old product with a few improvement, that suddenly got a killer UX.
See this as a friendly reminder to really invest into building a good user experience for your apps. Otherwise you end up with a really good product (from a technical standpoint) that nobody likes to use.
Bring GPT-3 into your apps
Now it's time to ask ourselves how we can improve our Power Platform projects with the help of GPT-3. While letting ChatGPT ghostwrite stuff for us is useful and fun, we want to take this to the next level.
It's great that you can ask ChatGPT to write a React component and copy it from the OpenAI website to your code editor. But it's even better to start writing code in the editor and let the AI take over in your editor instead of switching windows. That is exactly how GitHub Copilot works.
Let's build our own small GitHub Copilot into our apps and take our projects to the next level!
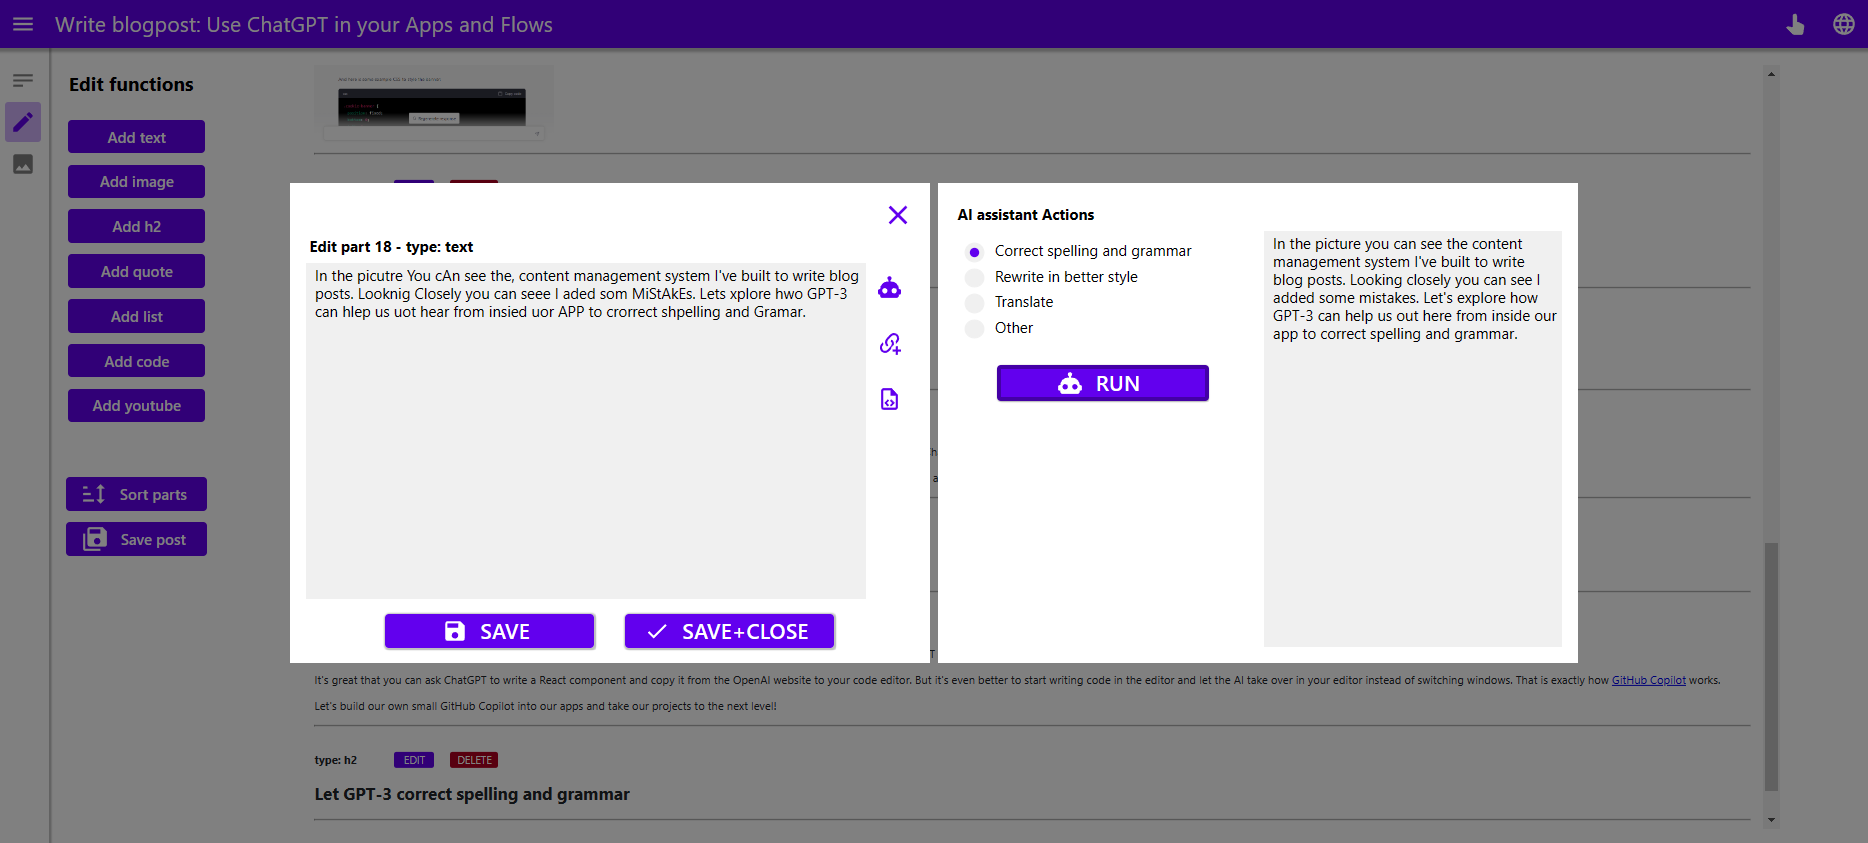
Example: Let GPT-3 correct spelling and grammar
In the picture you can see the content management system I've built to write blog posts. Looking closely you can see I added some mistakes. Let's explore how GPT-3 can help us out here from inside our app to correct spelling and grammar.
Follow these simple steps to use the OpenAI API in the Microsoft Power Platform.
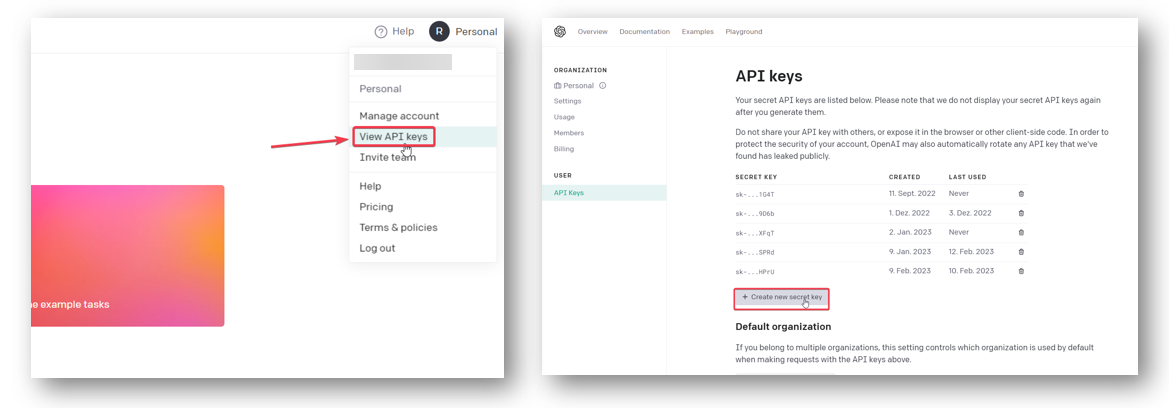
Step 1: Create an OpenAPI account and get your Api Key
Head over to OpenAI and create a free account (or use the one you created for ChatGPT).
While using the API is not free, you will automatically receive a 3 month trial with 18 $ worth of credits (that is enough for lots of testing).
Step 2: Create a connection to the OpenAPI connector
I already created the OpenAPI connector to GPT-3 a few months ago for everyone to use through the Independent Publisher Program (that's for another blog post). So all you need to do is to make sure it's not blocked in your environment and provide the Api Key from step 1.
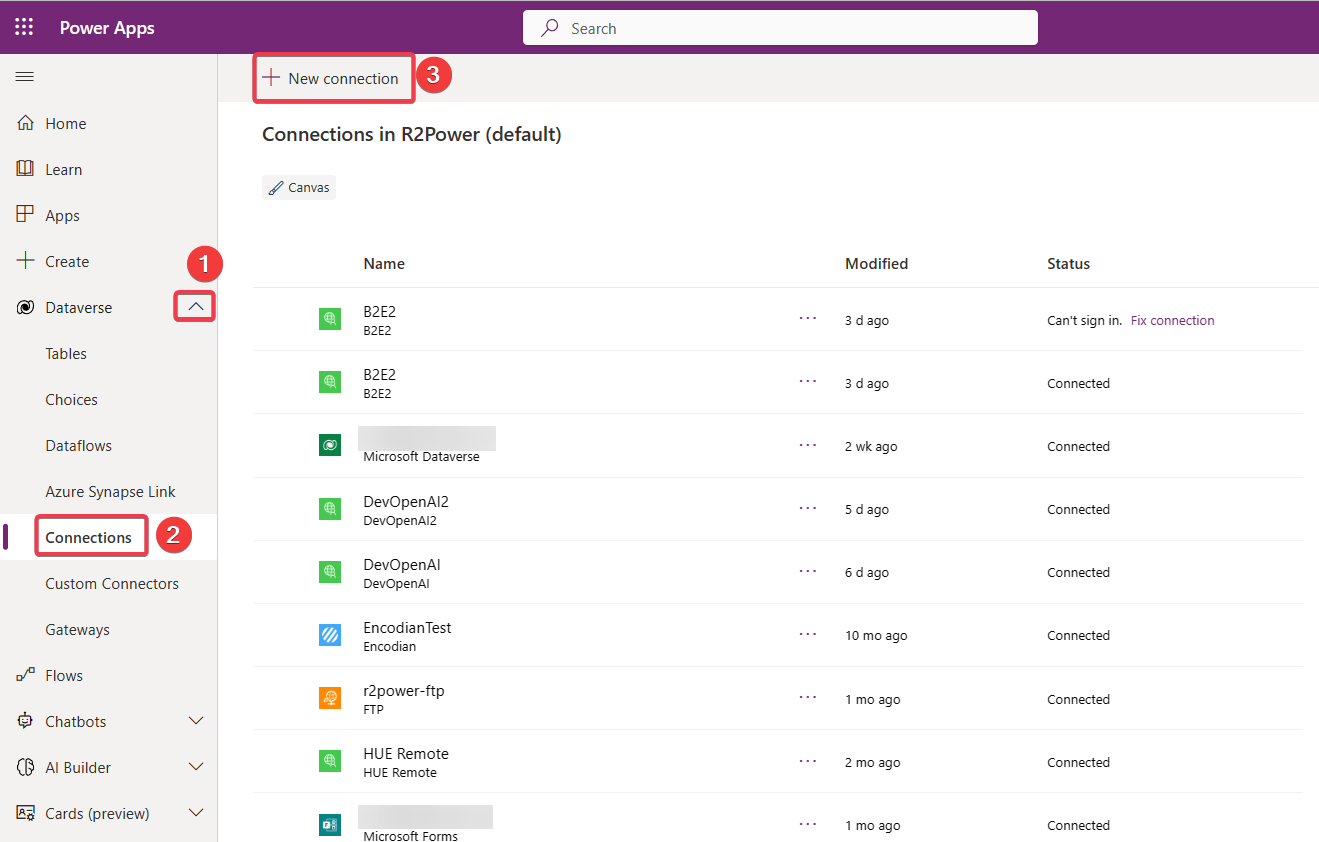
Head over to make.powerapps.com select your environment, expand "Dataverse" and select "Connections". At the top we click on "New connection".
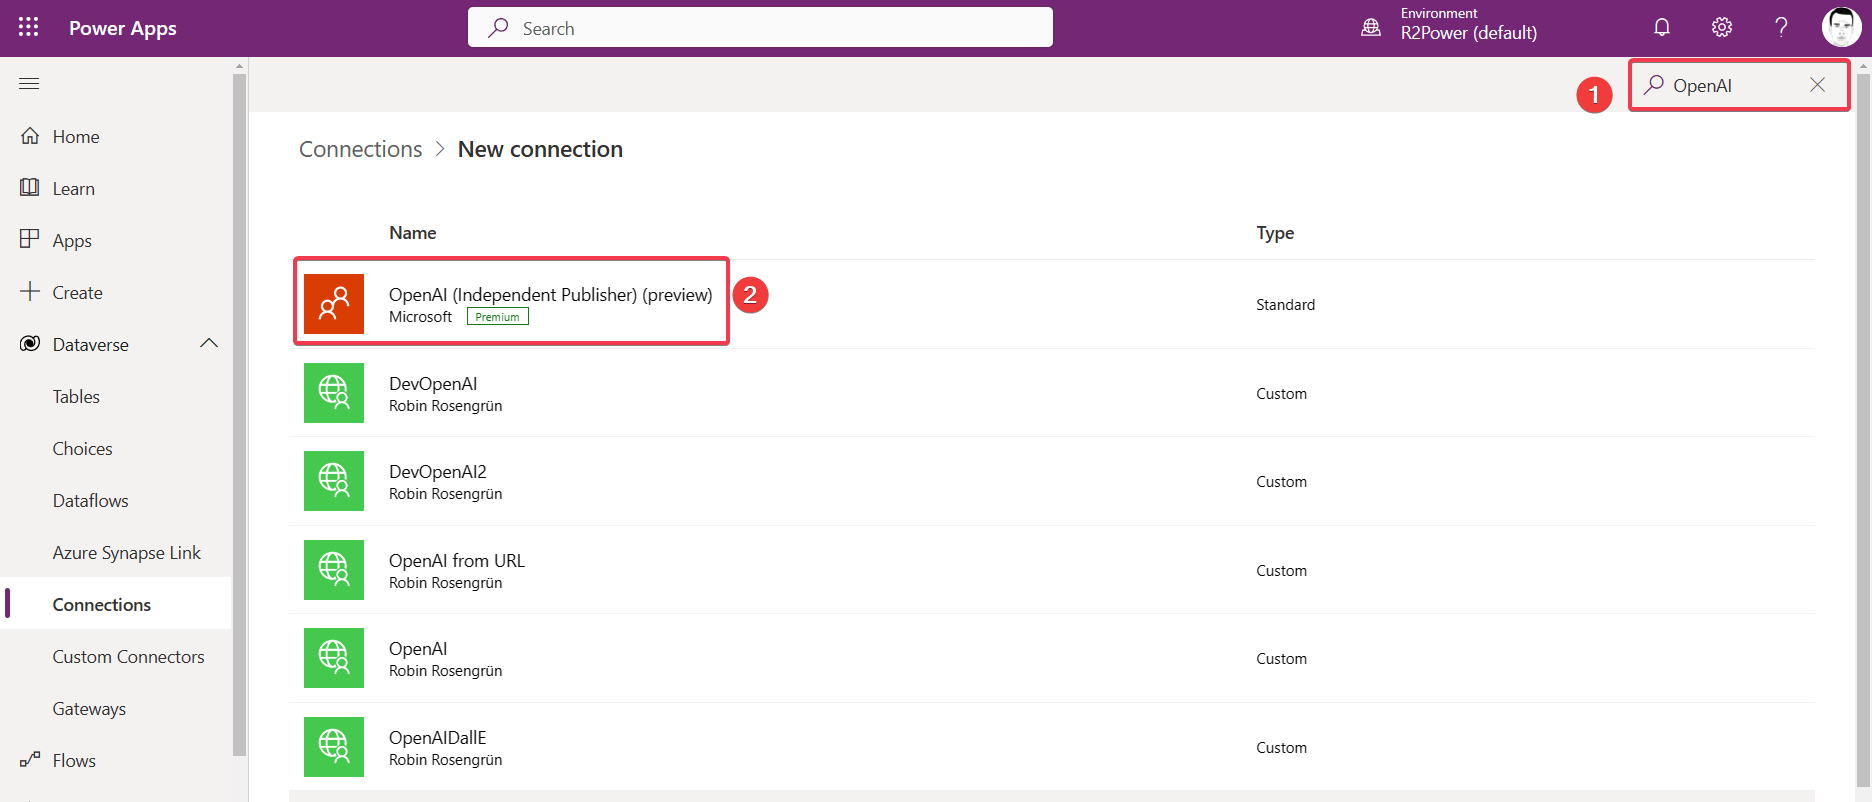
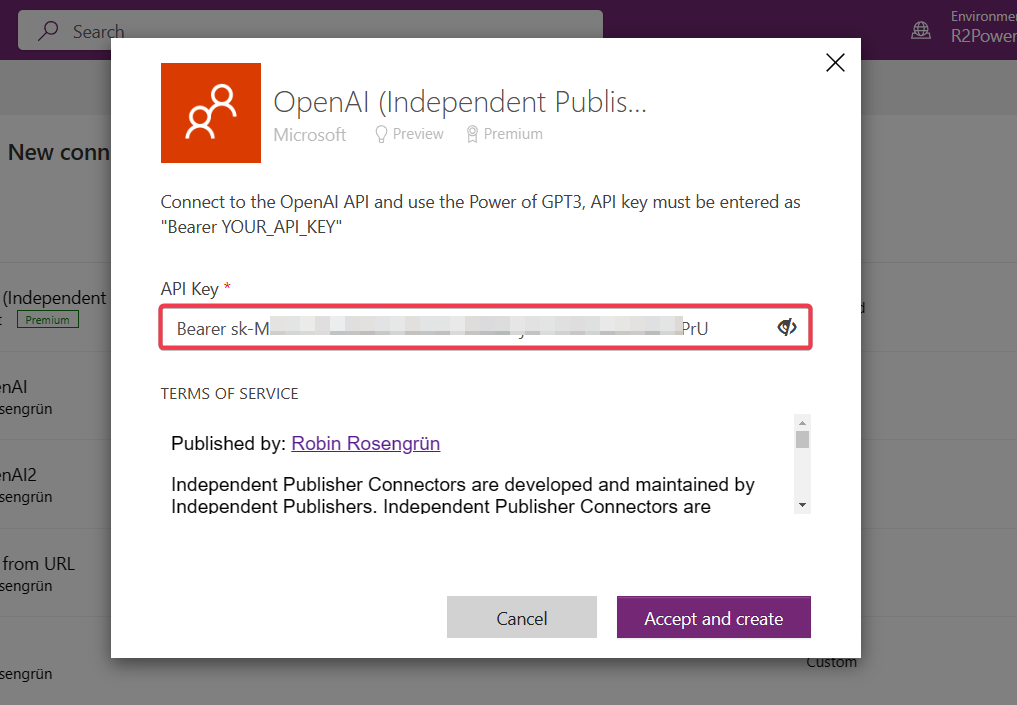
There we type "OpenAI" into the right search bar and select the "OpenAI (Independent Publisher) (preview)" connector.
Now we just need to type "Bearer " into the field and paste our API Key from step 1 into the text box.
Side note: my name ended up in the Power Platform! Get this cool perk as well by submitting a connector!
Step 3: Use the connector in your Canvas Apps or Flows
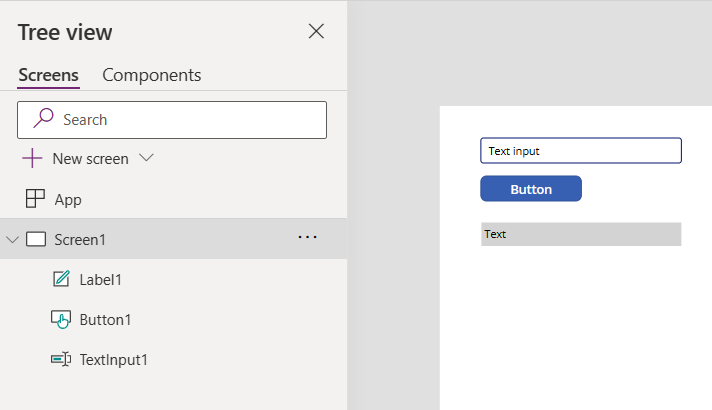
We will try the connector in a Canvas App with a really easy setup. We need a TextInput for our prompt, a Button to call the API and a label to show the result.
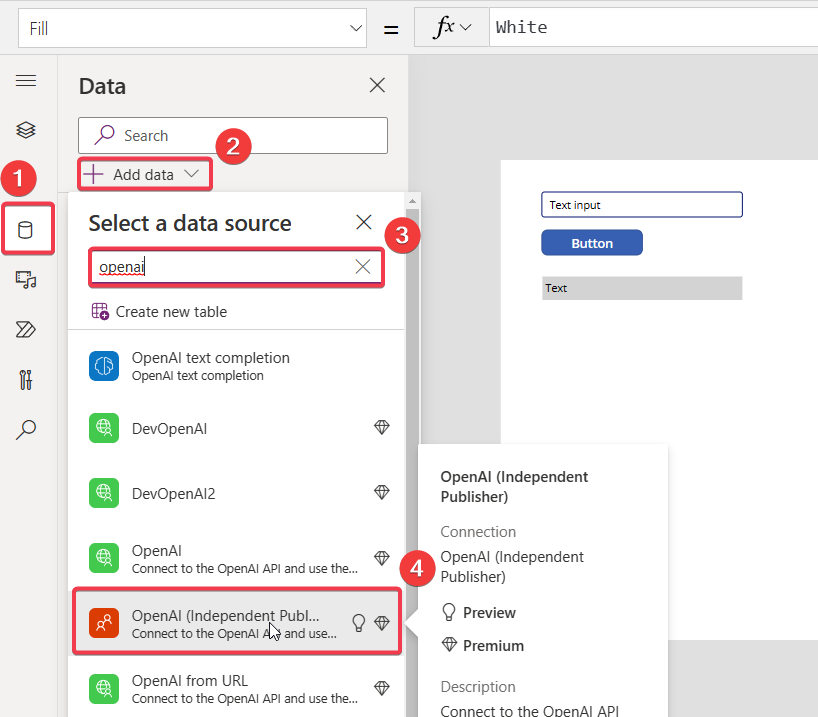
Now we add the connector as a data source.
Click on "Data" in the left navigation menu, select "Add data", search for "OpenAI" and select the "OpenAI (Independent Publisher)" connector. Now select the connection we created in step 2 and we are good to go.
Paste this code to the OnSelect property of the button:
 Set(varResult,
    'OpenAI(IndependentPublisher)'.Completion(
        "text-davinci-003", //engine, this is the most capable obe
        TextInput1.Text, //this is the prompt that will be completed
        { //the next parameters are optional
            n: 1, //how many alternatives should be created?
            temperature: 0.5 //0-1 (0 is deterministic and 1 is creative)
        }
    )
)
This will store the result of the API call in our variable varResult.
Lets take a closer look at a sample response object that I copied from the OpenAI API documentation, to see how we can access the actual response string.
If you are interested in the API you can find the documentation here.
This is the response object:
 {
  "id": "cmpl-uqkvlQyYK7bGYrRHQ0eXlWi7",
  "object": "text_completion",
  "created": 1589478378,
  "model": "text-davinci-003",
  "choices": [
    {
      "text": "This is the interesting part we are looking for!",
      "index": 0,
      "logprobs": null,
      "finish_reason": "length"
    }
  ]
}
The part we really want to use in our app is the value we find in text. But the choices object makes it a little bit harder to get to it. That is because it is an array, because we could have specified the number of completions to be greater then 1 (n parameter from earlier).
In nearly every usecase n will be 1. We can use the following code on the Text property of our label to get to the completion:
First(varResult.choices).text
First(varResult.choices) will return the first object from our choices array. From there we want the text property.
Response objects from APIs tend to be a bit more complicated, but once it clicks in your head it's actually really easy to get to the data you want!
Let's tackle the last remaining problem after typing our first prompt into the text input.
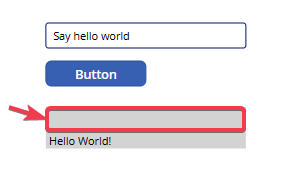
After typing a prompt to the input and hitting the button GPT-3 should complete your prompt. But GPT-3 added 2 new lines in front of the answer. The easiest way to remove them is to use the Trim() function.
Let's add it to our label:
 Trim(
    First(varResult.choices).text
)
Final thoughts
We saw how easy it is to call the OpenAI API from inside our apps. In future posts we will look into different use cases, where we include these calls seamlessly into our Apps and Flows, to automatically add value with the API.
Also please consider which information you are transfering to the OpenAI servers through your prompts. I would advise to strip any personal data BEFORE sending the prompt (especially in EU countries to stay GDPR compliant).
Also make sure to not send any sensitive or secret data, as it is likely that the models are trained with your inputs.
Now start getting creative! I'd love to hear from your Power Platform projects that include the OpenAI connector!

Create a tag list in Power Apps with Concat()